RSS

Category Archives: Not Playtested

The Thing in The Pit

This encounter is intended for 3-5 characters of 2nd level and makes use of current playtest/5th Edition data as of July 6th 2014


This one is a quickie: a room I designed for a one-shot dungeon crawl that unfortunately got passed over. Some of the party will be forced to fend off the slapping appendages of an abhorrent otherworldly creature, while the rest of the team attempts to breach the entrance to the dungeon before the lot of them are crushed. Make certain to have a player character on hand who can pick locks – or else this encounter is far from being fair.

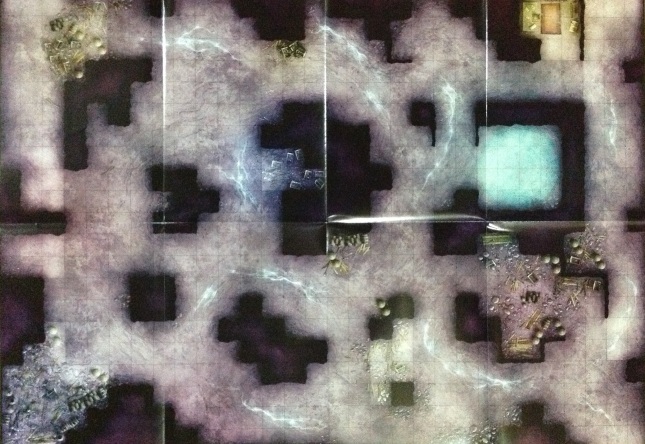
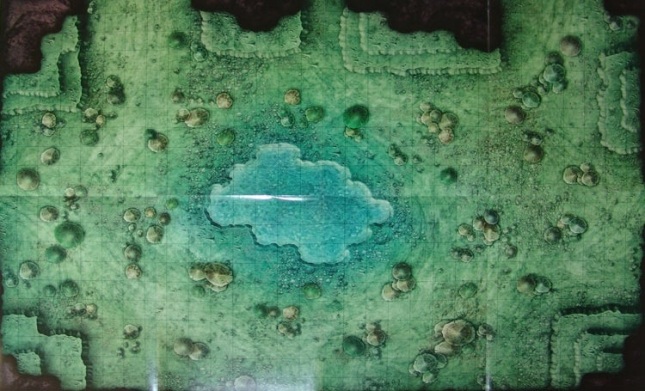
Map


Features of the Area

    Terrain: Each large block of dungeon floor is 10 feet by 10 feet. Any 5 foot squares marked with a star are considered difficult terrain

   The Pit: This yawning chasm reaches far down into the Underdark, where a massive, amorphous beast from the Far Realm is trapped. The drop is 20 feet where tight cracks and crevices leech deeper into the ground. The elastic tentacles have wormed their way up through these openings. Because the uneven walls of the pit provide good handholds, no check is necessary to climb back up (the writhing tentacles may pose their own challenges, however)

   Treasures: The locations of the two treasure caches are indicated by gold sunbursts on the map (see “Rewards” below)

   Exit Door: This sturdy steel door is a half-foot thick and incredibly heavy. It is shut up tight by three identical locks. Passage to and through the door is blocked by a toppled over column (see below).

      •Each lock requires a DEX DC 10 check to open, and some appropriate lock-pick must be used (a set of Thief Tools would suffice, and Proficiency in such tools grants advantage as normal). 

   Broken Columns: One of these collapsed columns has fallen in front of the locked exit door. With the stone ruins blocking the way, it will be impossible to unlock the door.

      •The column is very heavy, and another party member will be needed to lift it, if not completely move it out of the way. A STR DC 10 check is sufficient to lift the column up, allowing access to the lock. This same character can keep the column elevated for several rounds without having to make another check, but must use their action on their turn to do so. A STR DC 15 check will allow the character to shove the column aside and out of the way for good.

Monsters

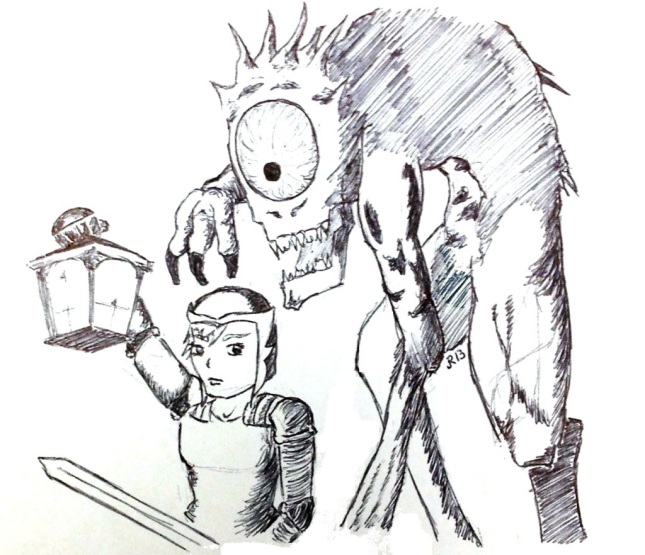
The otherworldly abomination is far too massive and durable to be killed by a few paltry, low-level heroes. Fortunately for them, the beast cannot drag its squamous bulk through the caverns below to reach them. Instead, it has extended several of its slimy, mouth-covered tentacles to probe for prey. Though each individual tentacle can be destroyed with some ease, more will take their place, and the creature itself will take little damage. Is the monster regenerating these tentacles, or does it just have a near inexhaustible number on its body? That’s a question bets left unanswered.

•x(# of PCs) Tentacles (40 EXP each)

__________________________________________

     Beast Tentacle (Medium Aberration – Limb)

AC 12 (Vulnerable: Slashing)

HP 8

   Available Actions:

Slam  (Within 15 feet of any part of the pit; one creature) +3 to hit (1d6+3 bludgeoning damage); automatic hit and +1d6 bludgeoning damage if target is already restrained

Trip  (Within 15 feet of any part of the pit; up to two creatures) DEX save DC 12 or target(s) are knocked prone

Ensnare (Within 15 feet of any part of the pit; one creature) +4 vs. STR or DEX (target’s choice); on hit target is restrained and may attempt the check again to escape as an action. A tentacle that has ensnared a target in this way may deal it 1d6+3 piercing damage as an action

   Traits:

•Each time a beast tentacle is destroyed, roll 1d4-1 (minimum of 1) – a new tentacle replaces it after that number of rounds has passed.

____________________________________________

Tactics

The tentacles have supernatural blindsight, and the best has enough intelligence to try and interrupt any character attempting to escape. Otherwise, they try to kill and eat every PC (like you do, when you are an amorphous beast)

Rewards

In the nook in the north part of the room, the skeleton of an unfortunate explorer (wounded by the beast and unable to escape) is crumpled against the wall. Amid the ragged ruin of bones and torn clothes are x1 Healing Potion, a silver ring worth 10 gp, and three raw, uncut gems worth a total of 100 gp

One of the water basins in the eastern section of the dungeon is home to the formation of some uncut precious stones. A STR DC 10 check (advantage if a dagger, prybar, or other tool is used) will free the gems, which can be sold for 50 gp


Tags: , , , , , , , , , , , ,

In Defense of the Refugees (AKA: “Save the Ladies!”)

This encounter is intended for five PCs of 3rd or 6th level using the most recent D&D 5th Edition statistics as of July 2

I was really fond of the Lord of the Rings console games that popped up in the mid 00’s. I mean sure, these weren’t the best beat-um-ups on the market, but they hit home by leveraging a franchise that I was obsessed with at the time. Given that one of my earliest memories is of playing Golden Axe with my father while propped up on a stool in front of an arcade cabinet – loving a co-op beat-um-up is never hard for me to do. 

A particular gem from those games was the “Minas Tirith Courtyard” level. In essence, it was a siege scenario in which you had to hold off endless hordes of increasingly difficult opponents, while making way for a flood of civilians to escape. The level ended once two-hundred villagers (all women, as I recall. Hence why this level became “save the ladies!” In common parlance) escaped to the safety of an inner wall. It was a grueling task, and a perfect complement for the scenes of devastation and warfare it was meant to invoke.

This encounter attempts to capture the feel of that scenario with a satisfying set-piece battle.

Setup

The PCs have agreed to help defend a community (castle, city, fortress, whatever is appropriate) from an invading army. While regular troops man the walls, the party is overseeing an evacuation. Civilian refugees may be fleeing the city out of a postern gate, falling back to an inner defensive ring, or breaking for the harbor to board boats that will take them out of the conflict. Regardless of the particulars, citizens have no choice but to rush through a warzone to reach safety. When the scenario begins, enemies have breached the defenses and the PCs will need to earn their keep covering the refugee’s flight.

At your discretion, some of the soldiers defending the walls may come down to lend the PCs a hand. Assign no more than one soldier per player, and bump the number of monsters in each wave up by one to compensate.

The party will face endless waves of opponents in this encounter. Their goal is to hold out until all refugees have made it through the exit gate in the southern corner of the map, before themselves pulling back to safety. Depending on the difficulty you intend, the number of total civilians can be adjusted up or down. As an alternate way of working the scenario, the parties goal might be to stand their ground until a prescribed number of refugees makes it through the gate (in this case, consider deducting the EXP value of slain refugees from the party’s total EXP).

   •Each round, 1d4 refugees arrives at the eastern edge of the map (Labelled “Refugee Entry” with eligible squares shaded in blue).

  •Every refugee that successfully escapes through the gate grants its EXP value to the party in the same way a defeated enemy would.

  •Number of refugees: Easy – 10; Moderate – 20; Difficult – 30

Map


When monsters enter the battle, roll 1d4: that monsters arrives in the corresponding entry point on the map (Labelled “Monster Entry”) and takes its turn. Monsters that arrive through entrance 4 will almost always make for the exit gate to cut off any refugees that get past their brethren.

Features of the Area

    Rubble: Walls broken by siege equipment, burning wagons, overturned market stalls, or even piles of corpses. Areas of rubble require 10 feet of movement to pass through.

     Barricade: These stacked barrells, crates, and debris grant half cover.

    Tower: This watchtower is positioned to overlook a great deal of the courtyard. The room is 25 feet up and features an arrow slit that grants Superior Cover, but does not allow the shooter to see anything east of the fountain. The advantage of being able to snipe from the safety of the tower are obvious, but not being on the ground to draw enemies away from the fleeing refugees is a serious disadvantage.

    Porch: This adjoined patio area has a sturdy stone railing all around it that can grant half cover if someone inside crouches. Leaping over the railing is easy enough to do, but requires 10 feet of movement.

    Fountain: The fountain in the middle of this battlefield grants half cover, or full cover if the attacker is on the other side of the large statue in the middle. Enterprising or vicious PCs will find it deep enough to drown orcs in.

   Stone Structures: The low stone buildings might compirse homes, gatehouses, customs offices, or storage. Though their slate roves aren’t especially steep, a 15 foot climb is still required to get to the top, where a PC could enjoy an elevated vantage point. Some of these building have missing walls, destroyed by siege weaponry, creating a path for the city’s invaders to stream into the courtyard.

Monsters

   —Level 3 encounter: One wave every other round

 Wave 1: 10 Goblins (Pg. 49)

Wave 2: 10 Hobgoblins (Pg. 55)

Wave 3: 1 Hobgoblin Leader (Pg. 55), 2 Hobgoblins

Wave 4: 1 Ogre (Pg. 69)

Continuous Waves: 1d4+1 Hobgoblins

—Level 6 encounter: One wave every other round

Wave 1: 10 Orcs (Pg. 70)

Wave 2: 7 Oorogs (Pg. 71)

Wave 3: 1 Orc Leader (Pg. 70), 2 Oorogs

Wave 4: 1 Hill Giant (Pg. 46)

Continuous Waves: 1d4+1 Oorogs


Allies

For the civilian refugees, use the stats for:  Human Commoner (Pg. 57) [And for the record, the civilians comprise both men, women, and children, not just ladies! All the same, don’t NOT save the ladies – that isn’t very feminist either.]

•For allied soldiers (if you choose to provide them), use the stats for:  Human Warrior (Pg. 58 – Replace armor with “Ringmail” and bump AC to 14)

Enemy/Ally Tactics

The attackers (be they orc or hobgoblin) are in the thick of city fighting now, and much of their discipline is fading in the chaos of battle. Use the following guidelines in determining an enemy’s targeting priorities:

1. If a PC is within 10 feet of an enemy, it will attempt to attack the PC

2. Enemies will otherwise attack the nearest opponent, whether they are a civilian, soldier, or PC

3. Enemies will switch targets to the last target that attacked them, thus allowing your players to “pull” the horde off of a civilian

4. Enemies who come out of entrance 4 will make for the exit gate, to block the passage of those fleeing

Though based on a video game, the best part of tabletop RPGs is their infinite mutability. These rules of engagement make for an interesting tactical encounter, but as always, use your judgement. Smart players will find ways to draw enemies away from the fleeing refugees. And likewise, a moment of dramatic ramping-up in which a foe purposefully ignores the players to slay the defenseless civilians might be just what the story needs.

Similarly you can follow a set of guidelines for the behavior of the fleeing refugees:

1. A refugee will always avoid provoking attacks of opportunity when possible (unless ordered by a PC)

2. Refugees always attempt to move toward the exit gate at best possible speed, allaying this only for reasons of safety

3. If within reach of an opponent, a refugee will use the Disengage action

4. If in reach of an opponent and unable to move closer to the gate, a refugee will use the Dodge action

5. Refugees consider PCs and soldier allies and can move through their space unhindered

If you opt to provide the players with back-up in the form of additional soldiers, consider letting the PCs give orders to the troops. They are in control of where the soldiers move to and how they form up, and can even order them to attack particular targets. If you wish to make this more complicated, perhaps an Easy Charisma roll is needed to clearly explain orders over the din and confusion of battle. In this case, PCs might only be able to give vague directions (“Stand left of the gate” or “form up on my right”) rather than letting the players choose which precise square for each soldier to stand in (the more tactical option).


Tags: , , , , , , , , , , , , ,

Sanctum of the Fiend of Possession

This encounter is intended for four 3rd level characters

     Concluding this series of encounters based on my old defunct Neverwinter game is the ultimate boss fight. Since the goal of the dungeon was investigating a cult’s plot to possess citizens with the spirits of evil outsiders, I figured the most fitting final encounter would be with a creature that is eager to possess the PCs. Originally, I paired this fight with a language substitution puzzle that could be uncovered using a series of scattered notes (your favorite “tell the story with journal entries” gimmick, from System/BioShock games). The recovered notes would reveal a key to the puzzle, allowing players to translate a magical glyph system that they would then apply to scribing a summoning circle in order to bind the Devil they were fighting. My notes were incomplete and relied on some specific circumstances so I eschewed them for the sake of this write-up.

     As before, I make references to people, places, and organizations in Neverwinter; swap these out for entities from your own campaign world where necessary.

Story Background

     Understanding the circumstances of this encounter requires a little setup. Any of these plot elements can be reworked or discarded as need be, but for brevity’s sake I’ll transcribe the situation as it was planned in my game. Beneath the House of Knowledge were a series of crypts and archives that housed ancient books, scrolls, records, manuscripts and relics. Alongside these were the bodies of priests and acolytes who served the temple in life – now comfortably resting between stacks of books in death.

     Loremaster Atlavast; the last Oghman priest to have survived the cataclysm makes his home in these crumbling archives, navigating through the sewers beneath the city when he needs to make trips above-ground. Eccentric, jealous, and more than a little snooty, Atlavast kept to himself, seeking only to preserve the knowledge that survived disaster beneath the temple’s crumbling façade. 

     But ever paranoid, Atlavast was quickly made aware of the Ashmadai cult’s infiltration into the refugees living in the temple above. He began a one-man guerrilla campaign against the cultists; using old spells and traps of his own devising to discourage them from exploring the lower levels of the House of Knowledge. He began to research devils and their other fiendish kin in order to better combat his enemy…and this was his undoing.

     In a moment of uncharacteristic boldness he read from a tome in the “Dangerous Books” wing of the archives. Lurking in the pages was a spectral possession devil named Xamzael that was freed from its prison between the covers when Atlavast read from a forbidden passage. The creature immediately possessed the priest but was denied access to the surface due to ancient wards placed on the the door to the archives, trapping it there. 

     Vaguely aware of the Ashmadai thanks to its limited ability to read Atlavast’s thoughts, the devil uses its host to find a means of escaping, and has even constructed a summoning circle to call more of its brethren into the mortal plane to help. Were it to escape, the devil would happily join the Ashmadai forces in conquering the city…with the expectation of becoming Neverwinter’s new infernal king, of course.

Tactics

Much of the flow of this fight is dictated by this devil’s particular qualities, so read its stat-block carefully and get a feel for how it orchestrates the battle. Xamzael will do its best to avoid direct confrontation with the PCs at all costs. It’s first action is to attempt to possess the nearest and hardiest available target; using the host as both weapon and human shield.

The fiend begins combat with a random devil arleady summoned, and Invisibility cast on itself if it is aware of the PCs incursion. Xamzael will prioritize summoning more help when his follwers are killed. He can use the summoning circle even while possessing a foe. 

Summoning Chart


Map


Features of the Area

  Illumination: Between the menacing red glow of the summoning circle and the flickering candles positioned about the room, the chamber is filled with dim light.

  Book Stacks: Each wall (Including those around the square columns in the center of the room) is covered in rickety shelves containing moldy old tomes. Some are ancient and forgotten spellbooks, some merely treatises on the magical arts, still others tertiarily related to the craft of wizards (such as accounts of a city’s “Mage Laws” or ledgers of the names of individuals burned for “witchcraft”).

There are eight and a half foot tall, free-standing bookshelves as well. A Moderate STR (Athletics) check could be used to topple the case over, dealing 1d6 bludgeoning damage and potentially trapping a target if they are not strong enough to remove the fallen shelf.

  Tables and Chairs: Worn out tables and chairs occupy the north side of the room. Once these were used for scholars studying the potentially dangerous tomes around them. Age has worn the furniture down, and the surfaces are caked with cobwebs and dust.

  Summoning Circle: This circle is a weak gateway to the outer planes. Xamzael has been using it to call forth lesser fiends to do his bidding. He need only spend an action to loudly incant in a foul language while adjacent to the circle in order to call forth a random devil (see the chart above). Once the circle has been used it will require an indeterminate time to recharge. 

Roll 1d6: on a 5-6 another devil is poised, ready to pass through into the material plane. This will be apparent to the PCs: the creature’s growls can be heard through the veil between worlds and the glyphs of the summoning circle itself glow with a pulsing red light.

Any spellcaster who expends a 3rd level spell slot and succeeds on a Hard Intelligence (Arcana) roll can disable the circle, closing the portal for good.At your discretion, appropriate spells like Protection From Evil might also close or disrupt the circle as appropriate. 

Monsters

Imp (pg. 26)

Lemure (pg. 27)

Spinagon (pg. 29)

x1 Possession Fiend/Xamzael (See below)

Rewards

Originally, the destruction of Xamzael was required to free Loremaster Atlavast, and the reward for this harrowing battle was acquiring a new ally. The needs of your campaign will dictate an appropriate compensation: the room is filled with scrolls, old spellbooks, and rarities. New spells, a tome sought after as part of a quest, treasure maps, or even some secreted away relic would all be suitable. 

New Monster


Tags: , , , , , , , , ,

The Defiled Infirmary

This encounter is intended for four characters of 4th level

This week’s encounter is also pulled from my scrapped plans to have PCs explore Neverwinter’s “House of Knowledge,” one of the places of note mentioned in the wonderful Neverwinter Campaign Setting, released for 4th Edition. The plan was to have the party investigate an undercover cult headquarters and bust up some of their various schemes. Some of the overtones can be adapted to match many nefarious organizations, but I’ll allude to Neverwinter personalities, groups, and locations, for clarity’s sake.

NEVERWINTER SPOILER ALERT: 

The former sanctuary of learning and literature turned refugee camp has been infiltrated by nefarious Ashmadai cultists. These minions of the evil Azmodeus are facilitating the possession of persons of high and low countenance all over Neverwinter. With their efforts, it might be impossible to know who is thinking for themselves, and who is a sleeper agent for the cult.

     A major theme behind all of my House of Knowledge encounters was to explore how a dark cult could operate within a headquarters that was seemingly out in the open (though more aptly, “hidden in plain sight.”) Thus, it was often the case that what the players first saw was merely a banal veneer covering up dark deeds.

     This encounter finds your party wandering into the impromptu infirmary within the House of Knowledge (Or any similar adventure site in which the enemy is operating under cover). Cultists, posing as members of a good-aligned priesthood, are offering aid to the sick, injured, and dying, among the multitudes of refugees and squatters. In truth, they are undergoing rituals of possession to allow their infernal allies to take up residence in the bodies of weakened mortals, before actually healing these hosts with the aid of the new spiritual parasite. 

     The action begins with the party finding the infirmary in working order – a seemingly worthy endeavor by well-meaning men of faith. But investigation will reveal the cracks in the façade, and if the cultists discover the PCs snooping too much, they may have a fight on their hands.

Triage

The Cultists: Two priests of Illmater; a human and half-elf named Robett and Taylon respectively, attend to the six (actually seven) severally injured refugees who are in this room. If pressed, they explain that they use a combination of clerical magic (they will not cast any spells in the presence of the PCs) and conventional healing to treat the wounded and the sick. Though they are cordial with the party, it is clear that they are quite busy attending to their patients – their faces are laced with sweat, their eyes marred by the dark circles that sleeplessness brings.

Religion DC 5: Illmater is a deity of compassion, healing, selflessness, and forgiveness

Religion DC 15: The symbol of Illmater that these priests wear is outdated – they use the rack rather than the more contemporary hands bound in red cord.

Religion DC 20: Some of the embellishments on the holy symbols they wear are out of place. Gilding on the design would be forbidden by mendicants of Illmater.

     In truth, these two are Cultists of Azmodeus – and thus members of the Ashmadai cult. While it is true that they are tending to the wounds of their piteous charges, they do so at a measured rate, leaving the patient’s bodies in a weakened state. This makes them more susceptible to a magical ritual of possession which the “priests” have worked on them. When completed, a creature from the Abyss will take up residence in the victim’s mortal form. While the cultists will calmly endure the PCs presence for a time, if they get too nosey they will be asked to leave. If they become belligerent, the disguised priests call for help in the form of x4 Ashmadai Thugs from the rabble outside.

     Obviously all this snooping could easily tip off the Ashmadai cultists. When the party first enters they will be quietly and politely questioned by one of the “priests” as to why they are there. He’ll believe any reasonable excuse. With a smile, both mengraciously decline offers to help the wounded, insisting that while busy, they have everything under control.

     The priest/cultists are indeed busy tending to the wounded, and thus won’t be keeping their full attention on the PCs. Whenever a character attempts an action surreptitiously, make a WISDOM roll for one of the cultists with disadvantage, against a DEX (Stealth) roll for the PC. If the cultist succeeds, he looks up from his work long enough to spot the the snoop.


In Sheep’s Clothing

Once in control of a victim, the devil can call on the attacks, spells, and abilities listed in its stat block, even in the host’s physical form. In doing so, they shed some semblance of humanity, taking on glowing eyes, a flaming corona, and sharpened claws and fangs for a time. Because this is so obvious, most of the possessed will be very unlikely to join battle and risk revealing their true nature.

Patient 1: A halfling man, badly beaten with clearly discernible bootprints on his face. This poor beggar ran afoul of some drunken ruffians who went to far in their casual abuse. He has been completely possessed by the creature assaulting his mind.

Heal DC 15: The wounds on this halfling show a strange rate of healing that neither magic nor medicine can account for. 

Heal DC 20: Even stranger, his scar tissue is of a reddish hue and smells faintly like a campfire.

Patient 2: Half chewed by rats and other vermin, this human street pauper spent any copper he could beg, borrow, or steal on an escape into a bottle. Exposure and the insistent hunger of vermin nearly cost him his life before he was found unconscious, not far from the House of Knowledge. The cultists have yet to begin possessing this man.

Heal DC 10: Perhaps the priests have not prioritized this man correctly…despite a few bandages he has some serious wounds still open and vulnerable to festering that have not yet been treated.

Patient 3: This lady of the evening stood up for her friend when the Mintarn Mercenaries charged with “protecting” the city attempted to drag the girl into lock-up on an imagined charge. The beating she received for her loyalty wasn’t as bad as the hypothermia she endured after being pitched into the river. She has been partially possessed.

Heal DC 15: That this woman has been submerged in frigid water for too long is plain. She does not, however, respond properly to your prodding and medical tests – her eyes lolling and incoherent moans coming from deep in her throat. Hypothermia wouldn’t account for the stupor she seems to be in.

Arcana/Religion/Nature DC 15: Not all of the poultices sitting on this bedside cabinet are medicinal, though you cannot place their use.

Arcana DC 20: One of the jars here contains embers from a funeral pyre – and a finger bone from a fresh corpse. This is a common reagent in dark rituals.

Patient 4: Maimed during fighting in one of the city’s countless skirmishes, this dwarf could find no work with both her hands damaged beyond use. Unable to earn a wage, she became destitute and without money, could not pay healers to treat her injuries. Thus she has come to the only place left her. This patient has been completely possessed by a fiend.

Heal DC 15: Maybe she’s asleep….her wounds aren’t so bad that she should be comatose.

Heal DC 20: There is a strange film on the stumps where her hands once were. Perhaps an infection after the priests amputated her rotting flesh?

Heal DC 25: Um…there are fingers growing back out of her stumps. That is not a thing that Cure spells can do.

Patient 5: With so many bones broken it’s a wonder this half-orc managed to drag himself all the way here. He was a scavenger; digging for loot amid the ash-choked ruins in the Blacklake District. Something must have gone wrong, likely a building collapse, and he barely escaped with his life. Whatever valuables he found were bartered for safe passage back here. The cultists have recently begun possessing this victim.

Heal DC 15: With such extensive injuries, so many bones shattered;  and the apparent lack of emergency care he has received, it is surprising this half-orc survived so long

Heal DC 20: His eyes are strangely discolored and you cannot quite tell why that would be.

Arcana DC 20: Amid his occasional meaningless mumbles you catch a few snatches of a language that makes your skin crawl – He’s speaking Infernal.

Patient 6:  This man bears the glowing azure marks of the Spellscarred. Whether he died of complications from that supernatural affliction or natural causes is hard to say. He’s still warm, and must have only expired a short time ago, probably going unnoticed by the overworked priests. They had not yet gotten around to trying to possess this victim, though he was to be an experiment in what happens when a devil’s spirit gains control of a spellscarred creature.

Heal DC 5: He’s dead.

Heal DC 10: These still glowing marks indicate that he is a victim of the strange supernatural storm known as the “Spellplague.”

Guest Patient

     To the Ashmadai’s benefit, they managed to acquire a gravely injured Red Wizard (Marked “R” on the map) who was at work spying on the city. Though ostensibly in service to Thay, the Ashmadai are secretly plotting against their masters, and possessing this agent would give them a leg up in their goals. The wizard is kept hidden behind a thick red curtain, and if pressed, the fake priests explain that he has a contagious disease, and that the PCs must stand back for their own safety.

     The Red Wizard is bound to his cot and gagged, his wounds being tended to intermittently while the cultists work their vile magic. He is still conscious and if someone barges into his room, will thrash about, calling feebly for help through his bindings. Like all those of his order, this mage wears a robe of scarlet and black, has a shaved head, and is adorned in wicked looking tattoos (in his case, covering the neck and below his ears).

     While evil, and certainly in league with some likely foes of the party, the necromancer, If rescued, will be genuinely grateful for the heroes intervention. Injured and out of spells, he is unable to put up a fight either in defense of himself or against the PCs. He will quickly bribe them with the 50 gp he had on his person (kept in a drawer near his bedside) if they allow him to go free.

Map


Monsters

x2 Cultist of Azmodeus (Storm Over Neverwinter pgs. 6-7)
x1 Ashmadai Thug (Storm Over Neverwinter pg. 5) – enters the battle from the hall outside
x1 Scorch Devil (Storm Over Neverwinter pg. 9) – One of the possessed patients. Enters the battle when he/she raises from the bed and begins to attack

To increase the difficulty of this encounter, consider add one additional Scorch or Fimbrul devil to the encounter per additional PC. In this case, the partially patients possessed patients finish their awful transformation as the conflict begins. To accommodate 3 players, remove one of the priests.


Tags: , , , , , , ,

[X1 Isle of Dread] Random Encounter – Dinozon Ambush

     As usual, theatre obligations have put my game on hold for the moment (And I’m not even in the show this time!) But all that down time means I can pick away at filling out some of the details I’m adding to the adventure. Since I’m changing some things around on the dear old Isle of Dread, that means adjusting some of the random encounters. Today’s post will be about replacing those goofy phanatons with something a bit more deadly. I’ll give you a hint…it required me to revisit my old love of paleontology. 

Spoilers

     Like last time, if you’re one of my players, buzz off! No peeking! Secrets are ahead! (Not that the title didn’t spoil things already….)!

Amazons on the Island

     I always prefer to tailor the game world to what my players (and to some degree their characters) expect to find in it. So in order to facilitate some intrigue with one PC’s backstory, I’ve replaced the phanatons with an encampment of vicious rogue amazons. Though typically only defensive in nature, these amazons have turned away from the tenets of their sisterhood in order to persue agressive goals of conquest. While these circumstance are unlikely to gel well with most other campaigns, the amazons simply use the Human Warrior stat block, and could easily be swapped out with pirates, natives, neanderthals, or any other humanoid already present on the island.

     What is significant about this encounter is what the amazons are riding into battle: vicious utahraptors. These large dromaeosaurs inspired the erronously named “velociraptors” that made you pee your pants when you saw Jurassic Park  way back….anytime you watched that movie. Using their dinosaur mounts, the amazons increase their mobility and lethality by degrees. Also, riding dinosaurs is awesome.

Setup

      Have the PCs make a normal check to determine surprise when travelling overland. If they are using stealth, the amazons will need to make checks to discover their presence (to simplify this, give them advantage on the check to account for the keen senses of their mounts and the fact that they are out on active patrol).

Plot Text

      You’re finally getting used to the sounds of this awful place. The hoots and growls of unfamiliar animals are becoming commonplace to your ear. You no longer feel the humidity and atmosphere as some alien blanket wrapping around and suffocating you. It’s not home. You’ve merely adapted. Like survivors always do.

     Which is why the lull in bird shrieks should have been a clue. Before you know it they are on you. Women, most of them human, clad in scanty, piecemeal leather and scale armor adorned with vibrant feathers, wisely trading some degree of protection for comfort in the steamy rainforest. They charge forward, mounted on bipedal lizards covered in the brightly colored feathers that their riders wear. You’ve seen several varieties of these reptilian monstrosities on the island already but these look particularly fierce: big as a horse with long tails, a head full of piercing teeth, and a wicked razor toe on either foot. 

     The woman warriors call out to you in a heavily accented common, “Outlanders! This island is ours, and you do not belong here. The penalty for tresspassing is death!” Well, that elimantes negotiation as a viable option. The women let out a birdlike warcry and move to circle your party. The raptors descend upon you.

Tactics

     Two of the mounted amazons rush towards the most isolated target, while the rest harry the column of PCs with ranged attacks from either side. Their plan is to force melee PCs in two different directions – splitting up the group and isolating individuals so that the amazons can gang up on individuals, using the raptor’s pounce ability whenever possible. 

     When half of the amazon patrol is dead or severally wounded, they will raise a call to retreat. Dismounted amazons will not leave their stranded sisters behind. Any captured amazons will only bring down further attacks from search and rescue patrols.

     The raptors are tamed and trained for war, but strongly tied to their riders and accustomed to the amazon’s particular commands. As an action, a PC can attempt a hard WIS [Handle Animal] check, to climb in the saddle and get control of one of the beasts. If not under control of a rider, a raptor will attack the nearest enemy, but is well trained enough not to engage one of the amazons.


Tags: , , , , , , ,

[X1 Isle of Dread] Cyclopean Towers of the Kopru – Part 1

These encounters are intended for any number of players venturing through “X1 The Isle of Dread” using the August release of the D&D Next Playtest (Levels 3-7)

     Despite my love of wilderness adventuring, no gaming group I was with did anything with hex crawls until recently. I discovered that they were really up my ally, allowing the players to greater agency in controlling the action and to create drama with a random set of tools that functioned better under the usual wear and tear of player insight. The obvious Skyrim analogies are all extremely helpful in understanding their appeal. 

     My group of intrepid D&D Next playtesters is about to embark on X1 – The Isle of Dread and as I gear up to run the adventure, I find myself a little disappointed by the placement of some of the encounters. Looking at the map, I feel like a lot of the action will take place on the main landmass; yet a lot of the location based encounters are on the periphery. While that lets random encounters (which I love!) to bear the brunt, part of the appeal of a big hexcrawl to me is finding places that can be revisited later. That Dire Bear warren you cleared? Great place to bed down for the night and sit out this storm.

     In this vein, I decided to spend the next few entries writing up additional, map keyed encounters for use with Isle of Dread. While stated for and intended for use with D&D Next, I think a lot of this content will be fairly useable for any addition of D&D running the adventure.

     I’ve included snapshots of the island map to help you identify which hex these encounter areas take place in.

A Note to My Players

Hey guys, thanks for reading my blog! You are all real champs. That said, I’m about to share secrets from our game with the internet at large for their possible use and modification in there own games. But that means you could read ahead, cheat, and ruin some of the fun and surprises for yourselves. Don’t do that. I’ll know if you do – and that’s the quickest way to get 2d6 mindflayers dropped into an encounter on a whim. 

You wouldn’t want that. So just navigate away, and trust that you’ll be seeing all of this very soon.

Go on.

Are they gone?

Ok, cool. Now the adults can talk.

The Kopru as Villains

     The encounters detailed below emphasize the Kopru presence on the island as a primary antagonist. In brief, the Kopru are serving as a vanguard for invasion from the Far Realm (themselves a derivative offshoot of Mindflayer and now the shock troopers of an Illithid invasion force). While the island’s isolation allows them to enter the material plane without fear of reprisal, the native’s success in escaping the Kopru’s imperial designs has prevented them from expanding. However the arrival of mainland pirates, traders, the PCs, and other foreign interests has given them the opportunity to take thralls, plant suggestions in sleeper agents, and even stow away aboard escaping ships. The Kopru have been waiting in secret for their chance to leave the island and expand their nefarious plans, and that time is now.

     Across the face of the island, the vile outsiders have erected eldritch standing stones. These obsidian coral obelisks glow with strange green runes, and give off an uneasy psychic energy that causes fitful dreams and eerie whisperings in the minds of sane mortals who wander too close. The corrupting influence of these monoliths has lead to the prevalence of carnivorous primates on the island.

     The positioning of the stones is determined by mystical ley lines that criss-cross the island.  The stones gather magical energy from natural pathways in the earth, allowing the Kopru to maintain portals to the Far Realm with minimal difficulty. What specific purpose these standing stones and the ley lines they influence has is up to you as the DM. In large part they are merely another mysterious site on the island and an objective for the Kopru to guard or reclaim as need be. You may wish to consider adjusting random encounter charts when the PCs are exploring near these standing stones to reflect the presence of alien beings from the Far Realm creeping through portals onto the island.

Standing Stone 1 (SS1) – The Champion’s Harem [4th Level Party, difficult]


          A strange obelisk, made of some shiny ebony stone and patterned as though it were comprised of a an adamant coral stands a good fifty feet high, jutting from the vegetation. Green runes of inexplicable origin glow brightly even in daylight at irregular intervals and asymmetric angles along the length of the structure. 
     Surrounding the eerie monolith are four colorful pavilions stand in a clearing surrounded by jungle vegetation. Movement is easily discernible in the encampment. Amid the bright rugs and silken tents are five women, and two men, mostly island natives though two of the women are blonde and fair of skin. All are scantily clad in silken garments, and adored with necklaces, earrings, decorative sandals and other wardrobe embellishments. They seem to be serving a heavily muscled native man covered in the skins of dangerous jungle beasts who sits under the central pavilion on a throne lashed together of saber-toothed tiger hides and long, broad-headed spears. Delicious looking island fruits, fresh cooked meats, and jugs of some kind of libation seem in no short supply amongst this odd yet inviting encampment. 

     The Kopru guarding this stone is a practiced mage, and has opted to lure travelers into a false sense of security using illusion magic. It attempts to mentally dominate one of each group it encounters, and enslaves the others to be sent to the central plateau to serve its masters – either as labor force, or food for mindflayers. The creature has cast a Disguise Self spell to appear as a genial and intimidating native warrior. Nearly all of the others are thralls, captured from the villages or among the pirates of the island. One of the non-native women is in fact a witch who abandoned her former allies and has sworn willing service to the Kopru in order to learn powerful dark magic from them. Though she dresses and acts like the other magically stupefied women, she is completely lucid and an ally to the monstrous sentinel of this place.

     The Kopru under his native guise is friendly and inviting to the PCs, offering food, drink, a place to rest, and even a few healing potions or offers of healing. The servants are pleasant and flirtatious, offering any lustful dalliance the PCs wish with the hearty approval of the presiding warrior. [If this all sounds like some cheesecake, Sword and Sandal Frank Frazetta painting, it is exactly that, and should be described as such].

     This seeming native warrior explains that he was a soldier in service to the leaders of Tanaroa, but grew tired of village life and struck out on his own for the excitement of the jungles. There he rescue the people of the encampment who work as his willing servants and concubines. He is quick to assert that they are no bandits, taking what they need from the wilderness, or claiming salvage from pirates and outcasts when possible. He claims to know nothing of the obelisk but acknowledges that it is unsettling. His choice to camp there was to investigate and see who or what might show up. 

     The scheme is to get the PCs to sleep without posting a guard.The food and drink is laced with a mild sedative in order to facilitate this (PCs attempting to stay awake must make a CON DC 10 Save with Disadvantage). Belligerent or suspicious PCs are bound and disarmed while they sleep. One of the PCs (your choice) is instead subjected to the Kopru’s Dominate Person ability (Disadvantage on the save while they are asleep). If successful, the Kopru uses this PC to encourage the others to acquiesce, to go with the Kopru’s allies, and to hear them out. If the whole party is captured, in 1d6 days, a patrol from the central plateau arrives to take the captives there, forcing them into slavery or feeding some or all of the party to a mindflayer. Opportunities for the PCs to escape may depend on fortunate random encounters (the patrol is subject to attack by the wild denizens of the island too!) or their own ingenuity.

     The Kopru never drops its Disguise Self illusion unless attacked., recasting the spell in secret for as long as the PCs remain awake. Should it run out of available spells, the Kopru under its guise explains that it must leave to go hunting, and waits until the PCs are incapacitated to return.

     Loot: Among the finery in the pavilions are 6d20 gp worth of assorted gems, and an additional 3d20 gp in coins. The Kopru and Witch each carry a spellbook which contains the spells they know. There are also two healer’s kits, and six healing potions, as well as ample food and wine to resupply an adventuring party.

   Standing Stone Effect: Creatures dominated by a Kopru for a full 24 hours while within 2 hexes of this standing stone must make a WIS DC 13 Save with Disadvantage. If they succeed, they are free of the Kopru’s control. Upon failure, they are permanently charmed by the Kopru (but subject to another save under the normal conditions for its “Dominate Person” ability). If the effect becomes permanent, the Kopru is freed to use Dominate Person again without losing control of this thrall.

     Similarly, mind effecting and Illusion spells like Charm Person, and Disguise Self are strengthened by the field effect, imposing Disadvantage on any creature making a save against them (This effects the players as well).

   Creatures: x1 Kopru (pg. 61) [w/ x4 Level 1 Spells: Disguise Self, Charm Person, Magic Missile, – x2 Level 2 Spells: Scorching Ray, Suggestion

     x1 Human Witch-Doctor (pg. 58) 

     x6 Servants (You can use the stats for Human Commoners to represent the servants, though they flee rather than opt to fight.)

Standing Stone 2 (SS2) – The Thing Beyond the Gate [3rd Level Party, Average]


     The towering 50 foot tall obsidian pinnacle jutting up from the dry basin below you is even more bizarre when set against the red rocks and grit. It’s coral-like texture is strange to witness this far from the ocean and in this cracked, nearly lifeless corner of the island. Covering the monolith are glowing runes of green, and cruder sets of glyphs interspersing them that flicker in blue. Hacked into the dirt and rock around the obelisk are magic circles, roughly 10 feet long and gleaming with an eerie and malevolent green shimmer. Sitting beside the stone is a waist satchel that seems to have been violently torn from its wearer – judging by the shredded leather and greenish blood staining it.

     The Kopru that lurked near this obelisk had grander designs than those of his superiors. He sought to open another portal to the Far Realm and draw out an opposing faction of Mindflayers and aberrant creatures to claim the island. But his inexperience and lack of proper materials made for several failed rifts between worlds, until his experimenting succeeded – with uncontrollable results. The small pathways to the Far Realm that he did manage to open allowed the tendrils of a vast, squamous, Lovecraftian horror from beyond the veil to reach through, grabbing the Kopru and crushing it to death. The creature waits by the tear in worlds eagerly to snap up prey form the material plane.

     The beast waits until the PCs draw as close to the portals as possible, (the satchel might serve as unintentional bait) using its otherworldly organs to “sense” beyond the portals. Once the party has slain # of PCs x2 tentacles, the beast recoils away from the portals for a time until it can regenerate its appendages. Though technically part of the same enormous beast, treat the tendrils as individual monsters. Only one tentacle can emerge from a portal at a time, meaning that the PC’s moments of victory can be quickly dashed when a lopped off tentacle is replaced by another writhing horror.

     Alternately, any spellcasting using Dispell Magic on a portal can easily close it, sealing off that route by which the beast can attack. Doing so earns the same EXP as defeating the tentacles in combat. Similarly, the PCs could merely move out of range of the tentacles, though doing so earns them no EXP outside of that gained for killing a tentacle.

     To increase the challenge level, change the number of tendrils to Party Members x3.

     Loot: The satchel contains x2 healing potions, x3 random scrolls containing level 2 Mage spells, and 75gp worth of magical components used in rituals.

    Standing Stone Effect: This obelisk distorts the veil between worlds, allowing for easy passage across dimensions. Any spell or magical effect that involves other planes is enhanced (Targets get Disadvantage on saves, die rolls are maximized, summoning durations are doubled, etc. This may involve some measure of DM fiat). The obelisk effects the hex it is in and all adjacent hexes on the map.

     Creatures: Eldritch Tentacles (see below)


Standing Stone 3 (SS3) – Cliffside Pteranodon Aerie [4th Level Party, Average]


     Standing tall on an outcropping of rock jutting out of the ocean not far from the mainland itself is a solid black coral obelisk. The sharp structure is ringed with green eldritch runes, glowing fiercely even in the light of day. Circling this fifty foot tall cyclopean juggernaut are three enormous winged lizards. The approach to this outcropping is made from a much lower elevation on the mainland. Several rickety rope bridges connect to bare stony platforms emerging from the waves. The spans angle upwards to the high elevations of each towering step-stone and are occasionally tossed about by rugged ocean breezes.

     This obelisk is perched on a precarious escarpment emerging near the costal cliffs of the island. The Kopru standing sentinel over it benefits from its isolation, but has still coerced a troupe of lizardfolk and their pteranodon mounts as his elite troopers. Two of the lizardfolk are stationed under the obelisk at all times. Three attend to their aerial mounts in a cliffside cave, high up on the mainland. The other two are out in the jungles hunting together for food to feed the entire troupe. The Kopru itself is busy seeking allies among the malevolent creatures of the ocean, and will not return for many days.

     When the PCs approach, any chance of parlay is for naught, the reptilian savages guarding this warped shrine have orders to kill on sight. The mounted lizardfolk will swoop in and attack with their blowguns while their beasts peck at the adventurers. Meanwhile, the two lizardfolk on the cliffs head down to the lowest bridge and attempt to hack it down, cutting off the PCs easy access to the obelisk (for ease of adjudication, it will take him three rounds of chopping to cut down any given bridge). The remaining lizardfolk arrive after the first round to attack from the rear.

     If your players are arriving at this challenge at a higher level, consider having the Kopru be on hand to defend its territory. In this case, the creature itself holds out above the action on the platform with the obelisk, attempting to dominate a PC with heavy melee attacks (or better yet, one who has crossed a bridge first and might be used to chop the bridge down with allies still upon it). Barring this, it uses its Wand of Magic Missiles to fire one missile per round, pelting the PCs with artillery until they draw close enough for its claws. If the Kopru is hard pressed or in danger, it uses the power of the standing stone to fly out of reach, opting to soar into the jungle and hide until the danger passes.

     Loot: Cut into the mainland cliffs and accessible via a rope ladder, the lizardfolk have occupied a small cave full of cookfire, gnawed bones, and simple, moldy cots. The Kopru itself rests in the back of the cave in a pit of mud dug for its comfort. The cave contains 3d20 gp in various stashes, and 1d6 precious gems, each worth 50 gp. If the Kopru is present, it carries 2 healing potions and its Wand of Magic Missiles.

     Standing Stone Effect: Creatures native to the Far Realm (such as the Kopru) gains a fly speed of 30 feet (Subject to restrictions as the Fly spell) at-will, while within the hex that the stone occupies.

     Creatures: x3 Pteranodons (pg. 31) 

x10 Lizardfolk (pg. 64) [3 mounted on pteranodons] 

—For increased challenge, x1 Kopru [Armed with a Wand of Magic Missiles (Magic Items pg. 15)]

 
Leave a comment

Posted by on September 10, 2013 in Combat Encounter, Not Playtested


Tags: , , , , , , , , ,

Infiltrating Zinnaatis’ Outpost

This encounter is intended for three players of 2nd level and uses the August D&D Next Playtest Rules

One of the difficulties of living in a subterranean hell-hole like the Underdark, is that you cannot make/grow all the things you desire to use in your various plans and plots. Thus, trade with the surface world is inevitable. For the Drow and other Underdark dwellers, this means dealing with the disreputable and cruel elements that lurk topside. To facilitate this, trade posts are often established within a few miles of an access point to the surface. Though not truly in the Underdark due to their proximity to more typical caves and caverns, these establishments are just as dangerous, and likely to be full of sinister humanoids (if you’re lucky!) from both above and below, each just as suspicious and contemptuous of the others.

This week’s encounter will take the PCs into one such outpost in search of a McGuffin (The ecounter will presume this is the stolen journal of a long dead wizard, but you can substitute and item appropriate for your campaign). The encounter is meant for a smaller group of PCs, and hinges on their use of stealth, deception, bribery, and diversion. If the whole camp is alerted, the PCs won’t stand a chance in open combat. But by being careful and clever, they can get in and out without ever being noticed.

Setup

A recent contact of the PCs with a magical background is piecing together the research of a long dead wizard in order to make sense of the old mage’s spell book. In trying to dig up his belongings, the contact found that most of them were stolen not long ago in a raid on a trade caravan. Some sleuthing anda little  divination   lead him to locate the dead wizard’s journal – a half mile below the surface in a Drow traders den called Zinnaatis’ Outpost. The book’s exact whereabouts weren’t precisely discovered, so the contact will need the PCs to investigate the outpost, and sneak out with the book.

Each area on the map has some activity going on that might help or hinder the PCs efforts to search for the book. The events and relevant stats are noted below. All creatures referenced are from the Bestiary document unless otherwise noted.

Zinnaatis’ Outpost

     Established by an overly ambitious Drow soldier, this forward camp is close to the surface world; making it an ideal trading post, and an even better place for spies to nest. It’s been around for a good ten years now, and its success is based largely on Zinnaatis hands-off approach to management. A wise businesswoman, if not a loyal soldier, she made sure that traders had privacy, a few creature comforts, and a heaping helping of her own religious zealotry.

     Guard duty is covered by various mercenaries hired from among the surface traders by Zinnaatis. She permits her various trade contacts to come and go as they please, so long as they pay the entry toll and shoulder the brunt of her unusually high taxes (much of which find their way into her personal coffers). Among them are hobgoblins, kobolds, orcs, and even some unsavory human bandits. 

I Prefer A Straight Fight to all this Sneaking Around…

     Ostensibly the PCs would not be welcome in a place like Zinnaatis’ Outpost. Thus they must take measures to conceal their identities and intentions. Anything from disguises, to a good cover story (slaves are traded through here regularly, and some treacherous humans, half-orcs, and half-elves serve as mercenaries down here, and are thus not unheard of) to some good old fashioned stealth would suffice. Make the players work for it through roleplaying and careful planning. A solid cover story or disguise should stand on its own, calling for rolls only if the PC’s behavior becomes suspicious.

     However, if the party insists on picking a fight, even the fractious creatures of the outpost know they have many common enemies on the surface – with the most likely foe being adventurers! Any monsters in the area who witness the PCs behaving suspiciously will most likely turn on them – and some will probably even slink off to the others sections of the cavern for reinforcements! Remind the PCs that this is a dangerous mission, and that discretion is the better part of valor.

A Blade in the Dark

     These kinds of infiltration narratives when presented in films like (any) James Bond, literature, or video games like Metal Gear Solid and Assassin’s Creed, feature protagonists getting the drop on their foes and dispatching them quickly and quietly. The D&D Next rules don’t provide any specific insight on this sort of situation (it doesn’t exactly fit the circumstances of a coup de grace), as the “one-shot kill/incapacitation” tends to be a rare situation and a cause for easy abuse of the rules. At the same time, this encounter presents circumstances where it would be perfectly logical for a PC to drop a foe with a single roll – and that’s likely how your players will be thinking! While game balance is always important, maintaining verisimilitude keeps players happy and makes your world consistent – and sometimes that requires a bit of fudging int he rules. Since not everyone is a rogue and benefits from sneak attack, here are a few suggested rules “hacks” when dealing with this very specific situation:

   •A foe that is caught completely unaware might be considered eligible for a “coup de grace.”

   •Otherwise you might allow such an attack to deal 2 or 3 weapon damage dice (giving the foe an unlikely chance to survive, while not ignoring the fact that rogues should be better at this kind of work than any other class.

   •Snapping the neck of a sentry could be represented as a simple STR vs. Opponents CON score as DC roll. This would require the assailant make a DEX roll to sneak up on his/her target first (thus ensuring that rogues remain superior at wetwork to other classes).

These sorts of ambushes rarely require the PCs to roll initiative(unless their victim spots them first, or survives the attack). After stealthily eliminating a foe, there is always the problem of what to do with the body, of course…

Map


A full poster version of this map is included in Vaults of the Underdark. All sections of rubble and furniture count as difficult terrain.

It’s Never That Simple

     If your PCs were successfully subtle, consider having one of the patrols follow them as they attempt to reach the surface, and attack them en route. This will discourage them from lingering, and given any players feeling dejected by a lack of combat a chance to wet their blade.


Patrols – These patrols wander around and outside the outpost, looking for suspicious activity and on hand to quell any hostilities flaring up from a deal gone awry. Each patrol’s path is dictated on the map, and it will take them about 5 minutes to complete a circuit (they are searching the area, chatting with visitors, and taking their time). 

     Unlike some of the other occupants of the outpost, the patrols will know right away that the PCs do not fit in, and will accost them, attacking quickly if the PCs don’t have cover stories or disguises that hold up. If they see the PCs approaching or leaving the outpost (essentially in areas “off the map”) they will charge after them without questioning.

     Features of the Area – Patrol 1 (P1 on Map) – x1 Drow (pg. 39), and on a leash, x1 Guard Spider(As “Spider, Giant) but 10 HP and medium size); Patrol 2 (P2 on Map) – x2 Hobgoblins (pg. 55), x1 Hobgoblin leader (pg. 55) 

1. Statue of Lolth – This sixteen foot tall effigy occupies the high-ceilinged middle chamber of the outpost. Zinnaatis is an especially pious drow, and sings her Demon-Web Godess’ praises to all of her trade partners. Right now, however, a crowd is gathered round the statue. A tall human clad in black robes and wearing a skull-like mask is screaming an angry sermon from the base of the massive artifact. 

     He asserts that his God (pick whichever evil deity you deem appropriate) is far superior to he lowly bug-witch of the drow. The statue has angered him, and threatens that his cultists will refuse to trade with the outpost if they are not given equal religious representation. For all his unscrupulousness, the priest knows his audience, and is managing to work the crowd into an uproar. Many of the creatures in this are are packed together to listen, two or three at a time occupying the same five foot space.

     It would not be difficult to begin a riot in this crowd which might provide convenient cover to the PC’s actions. However, getting caught in the rioting is its own danger. Moving through a rioting crowd can be accomplished with a STR DC 10 check at Half Speed. For every round stuck in the crowd, a PC must make a CON DC 10 save. Failure results in 1d6 bludgeoning damage and the PC is knocked prone, save for half damage.

     Features of the Area – Creatures here have Disadvantage on WIS checks due to their distraction with the oration. This chamber is brightly lit by torches.

     Creatures – x1 Skull-Masked Priest (Dark Adept pg. 11) and his x4 Dark Adepts (pg. 10), x10 Kobolds (pg. 59), x12 Goblins, x3 Orcs, x4 Hobgoblins, x2 Drow

2. Trading Floors – These rooms are crammed with merchants and shoppers. Those trading offer all kinds of mundane wares at or below book price (since they are primarily stolen). Magical items are traded in the “library.” It is not entirely unusual for violence to break out on the trade floors and is acceptable so long as it is brief and contained. The traders are from al walks of the Underdark and the surface, and they all keep a close eye out for thieves. Guards patrol the cramped crowds, but have Disadvantage on WIS checks to notice any foul dealings due to the size of the crowd (this is not true for merchants keeping an eye on their goods). The punishment for stealing here is the summary removal of both hands. If asked about a book, anyone here will recommend checking with the magical item vendors in the library.

     Features of the Area – Creatures here have Disadvantage on WIS checks due to their distraction with the bustle. This chamber is brightly lit by torches.

     Creatures – The guards consist of x2 Hobgoblins, x3 Goblins

3. Latrines – This room is perforated by holes in the ground full of stinking biological waste. It is the unfortunate duty for some kobold or goblin to clean the pits as punishment once a day. There is little for PCs to find here save disease. If they are using a light source, grant them a WIS DC 10 check with Disadvantage to Spot. A succeeding PC notices a glint coming out of one of the pits. One of the hobgoblins concealed a gem worth 100 gp that he pinched from the latest cache of loot. Good luck retrieving it.

     Features of the Area – This room is unlit.

4. Sealed Storage – Inside this chamber are all of the large and expensive trade items that merchants would prefer a little extra security for (at a cost, of course). The door to this room is made of heavy steel, and shut with a lock (DC 15 to pick). There are always two sentries on the landing outside (choose from the creature near the Statue of Lolth above). Within the room are four well armed and disciplined hobgoblins. They imedietly question anyone entering the chamber and are very suspicious of anyone not accompanied by one of the Drow (Disadvantage on checks to Bluff or Intimidate).

     Most of the supplies are piled up in crates and boxes in the center of the room, leaving only 5 feet ofclearance  along each edge. Hobbling over the supplies counts as difficult terrain.

     Features of the Area – Dimly lit by a single lantern hanging above the door. The heavy door and noise outside mean that it is very difficult to hear anything in this room past the stoop outside. sentries who might hear yelling or the din of battle make their WIS checks with Disadvantage. At the back of the room are armor stands with 5 medium and 1 small (a gift for a particularly loyal goblin!) suit of Drow Chainmail. In addition there are various traders crated here (DM discretion). The warehouse floor is always attended by a goblin known as “His Majesty the Count” who does Zinnaatis’ counting and sums – he is easily recognized for his smudged apron and tiny leather visor, as well as the oversized ledger book he constantly lugs around.

Drow Chainmail – AC 16 (Otherwise as “Mithril Chain”)
These shirts of extremelly light, shimmery black mail are prized by the vicious dark elves. Drow Chain is infused with the magical contamination Of the Underdark and as such, cannot survive long outside such environs. It breaks down into a black dust after exposure to sunlight in 2d6 days.

     Creatures – x5 Hobgoblins, x1 goblin

5. The “Orb and Weaver” Tavern – Cramped, hot, and reeking of cheap grog and sweat, the sign of the Orb and Weaver refreshes the surly raiders and bodyguards that service the Underdark merchants. Hanging above the bars entrance and well lit by phosphorescent lichen is a wooden sign, painted in purple and featuring the image of a spider hanging over a loom, its abdomen appearing to be a crystal ball. The echoing of the chamber means that even on a sparse night the bar is booming with a cacophony of voices. 

     The bartender, Luhrg the Mugbreaker (Use the “Oorog” stat block) has been working this tavern for a year now and is a surprisingly quick study for an orc – he stays friendly with everyone and is happy to sell rumors and information for a price (typically between 5-15 gp). Luhrg hears about everything eventually, and knows every face that passes through; meaning that he knows where to find whatever you want. It also means he’ll be extremely nosey about the PCs presence, battering them with friendly questions in order to loose the details from them. If the PCs play along and their cover story holds up, Luhrg will be amiable and helpful. Close lipped PCs will find themselves being overcharged, ahrassed by the customers, and eventually tossed out.

     The PCs will needs be on their best behavior here. The patrons are all drunk and spoiling for a fight. So long as no weapons are drawn, it would be acceptable for a barroom scuffle to occur, though that will likely mean the end of the PCs stay for causing trouble. A fistfight with one table of ruffians might cause the whole bar to erupt in flying fists, or only attract the cheers of other tables (at the DM’s discretion). Given the cruelty and grudging nature of the inhabitants, a bar fight would likely mean the patrons attacking one another just as soon as the PCs! To keep the peace, Luhrg has hired on a Drow waitress who is fully armed beneath her revealing bustier (use the Drow stats with AC 12).

     Luhrg serves he normal fare for a low quality tavern, grog, moonshine, watered down ale, as well as more exclusive local drinks with vile names like “Mushroom Musk” and “Umberhulk Sweat.” The tavern’s most expensive drink, the “Mindflayer Mucous Shot” has an unusual effect on those that can resist it. Any PC who downs the shot makes a CON DC 12 Save. They instantly fall unconscious for 2d10 minutes on a failed save. A successful save grants Advantage on any lore roll for the next 1d4 days.

    Features of the Area – Well lit by candles, lanterns, and lambent lichens. Moving anywhere in the cramped bar requires double movement.

     Creatures – x1 Orog (pg. 71), x1 Drow, x1 Orc, x3 Goblins, x2 Hobgoblins, x2 Gnolls, x4 kobolds (at the bar, on booster seats)

6. The Library – Not dissimilar to the trading floors, this oddly cozy nook houses several bookshelves as well as magical oddities strewn about on carpets. There is a sales counter in this room, attended by a rather grubby looking human hedge-wizard who eyes everyone entering as though they are a potential meal. He grumbles to himself at odd intervals. At the moment, most of the sellers are not on hand, just a fewgoblin assistants   attending to their master’s wares. 

     The book the PCs seek is sitting plainly upon the largest shelf, and the attending wizard will explain that it is worth 550 gp or the equivalent in barter. 

     The open space outside the Library consists of a crowd of gathered villains. They talk and mill quietly amongst themselves, trading gossip and making impromptu deals. The crowd can easily be used as cover for sneaking PCs, or a source of information.

     Blocking the northward entrance into the gallery where the Statue of Lolth looms is a blockade consisting of gnoll ruffians. They will not allow the PCs to pass by, snarling something about the magical sundries beyond are only for privileged shoppers approved of by Zinnaatis herself (albeit much less eloquently). Though the sentries are very adamant, a CHA DC 20 check to intimidate might convince them to let a PC by (any demonstration of magic prior to this grants the roll advantage). What they don’t realize is that any such sentries guarding the rear entrance are incapacitated.

     At the intersection The alley west of the Library are a pile of drunk goblins. Though mostly unaware of their surroundings, the leader is an angry drunk, and will get belligerent and combative if the PCs are too loud or try to talk to him. The PCs might be able to get away with fighting these goblins (the crowd nearby has little concern for the wretched creatures) though efforts would needs be taken to make it appear as one of the expected brawls that occasionally crop up in the outpost.

     Features of the Area – This chamber is brightly lit by torches.

     Creatures – x1 Human Witch Doctor (pg. 58), x1 Drow, x2 Goblins; The blockade in the alley consists of – x3 Gnolls (pg. 48); The crowd outside the Library is made up of – x1 Green Hag (pg. 53), x2 Drow, x2 Doppelgangers (pg. 32), x3 Dark Adepts, x1 Cultist of Asmodeus (pg. 9); In the west alley – x3 Goblins, x1 Goblin Leader (pg. 49)

7. Zinnaatis’ Mansion – Calling this underground holdfast a “mansion” is generous. It is little more than a barracks. The first floor contains kitchen, storage, bunks, armory, and a few offices. The second floor is reserved as Zinnaatis’ private apartments. From here the Drow officer tends to the business matters of the trading post, keeping her collected taxes (and bribes) locked in a magical safe containing a “Bag of Holding” within which is her horde. The mansion is not included in the scope of this adventure. The divinations used to scry out the McGuffin mark it being in the trade floor, not within the walls of this complex. However, players being players, you may wish to pull out some appropriate map in case they decide to investigate. Stats for Zinnaatis are given below, though a scrape with her would be a suicidal fight for a small number of PCs at this level.

Rewards

     The D&D Next Playtest gives relatively good guidelines for rewarding players for non-combat situations. Given that this encounter involved a great deal of guile and problem solving, it would be a shame to overlook experience rewards merely because the PCs avoided open confrontation. That said, their accomplishments would not equate tot he same value as all the monsters who appear in this encounter, many of whom serve as intimidating set dressing and a reminder that the PCs are in over their heads and vastly outnumbered. 

     As a general rule, for every chamber the PCs successfully navigate without starting a fight, grant them 100 EXP (grant combat experience as normal). If their plan is especially clever, dramatic, amusing, or effective, feel free to throw another 50 EXP in as a bonus. Completing the entire encounter successfully is worth an additional 100 EXP. 


Tags: , , , , , , , , , , , , , ,

Take and Hold Victory

This adventure is intended for five players of 3rd level using the August 2013 D&D Next/5th ed Playtest

     As you’ve likely heard, the public component of the playtest for D&D Next/5th ed is coming to a close. While I was a bit surprised that public playtesting would not be a constant, I’m not un-happy with the decision. My gaming group has been consistently playing with the playtest rules for almost a year now, and having a “set” core of rules will be a welcome change for those frustrated with having to re-imagine their PC every couple of months (an expected symptom of playtesting but nonetheless tiresome when you were just getting used to your character).

     While I take umbrage with some elements of the newest release (namely the overinflated feats, and the lack of character customization at Level 1) I’ve generally been extremely happy with the playtest, seeing it as a marriage of 3rd and 4th editions along with some new DNA that makes for a much more manageable game. It’s fun for the players, and it is effortless to DM. And I can’t sing the praises of the emphasis on Bounded Accuracy enough!

     Given all this, you’ll finally see the inevitable shift towards exclusively D&D 5th content here on Save Vs Weekend. While writing up hybrid adventures isn’t terribly arduous (as WoTC is demonstrating with the ambitiously multi-edition Murder in Baldur’s Gate) I usually have limited time to write, given all my various obligations. Saving a little time by writing for one edition (the easier one to write for as well!) means I can get more encounters out to you faster.

     Look on the bright side – if you play Pathfinder, it will require little conversion on your part to use my content now! And if you are a die-hard 4e fan, now you have another traitor to rage against! Edition turn-coats!

Bunker Battle

     This week’s encounter serves as a perfect follow up piece to “Battlefield Extraction.” It employs the accompanying “Dwarven Redoubt” map – both of which come with Vaults of the Underdark and are designed to be used in conjunction at the same time. For our purposes it is a separate location, though  you may wish to presume the assigned mission is all a part of the same military campaign featured in the plot to the previous encounter.

     As a side note for Dragon Age fans, these maps strongly reminded me of that world’s “Deep Roads” and it is no accident that the concept is reflected a bit in these encounters. The best thieves steal from the best.

Setup

     The PCs have agreed to aid (or been coerced into service by) an army of dwarves, hard pressed to defend their underground community. Thanks to the PC’s efforts the tide is beginning to turn, but one major impediment stands in the way of immediate military progress: A fortified bunker teeming with enemy forces. Their presence in the  fortification means the combined might of goblins, kobolds, orcs, ogres, and worse are constantly threatening a devastating counter attack. Due to it’s strategic position, the only option is a more-or-less frontal assault. The PC’s will need to navigate through a series of makeshift traps to dislodge their opponents. After a brief respite, the party will have to dig in and face a brutal counter-offensive; surviving until their own reinforcements arrive.

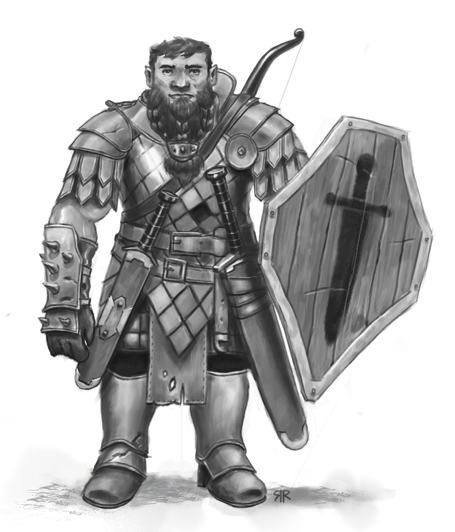
    But don’t think the dwarves are simply exploiting the PC’s kindness – each player will gain control of a dwarf soldier to serve as his or her second on the battlefield. Give each partner a distinct personality and make them likable – that way it’s all the more heart-wrenching when they die horribly in battle!

Map


A poster version of this map is available in the “Vaults of the Underdark” map pack from WoTC

Features of the Area

   Illumination:  Braziers, torch sconces, and a battlefield fires mean this chamber is filled with bright illumination.

   Stones, Rubble, Crates and barrels:  Rough terrain.

   Heavy Wooden Doors: These sturdy doors are barred from the inside (AC 13, HP 35).

   Arrow Slits: Three-Quarters Cover for those inside the bunker, but they do not hamper the ability to make ranged attacks for those firing out of them. Only reach weapons like a glaive can make melee attacks through an arrow slit, and do so with disadvantage.

   Yellow X – Bear Traps: These round metal traps with jagged teeth feature a pressure plate in the middle. When a creature steps on the plate, it clamps the steel jaws shut on the victim’s leg. [WIS DC 10 to spot with Disadvantage, though a DEX DC 15 saving throw negates the trap’s effects. On a failed save, the bear trap deals 1d4 piercing damage and the target is immobilized. A trapped creature can escape with a DC 10 STR check, but takes an additional 1d4 slashing damage. Alternately, a character trained in Thieves Tools can disable the tap with a DC 10 DEX check as an action].

   Red X – Collapsing Bridge: Kobold trapsmiths have weakened the supports on the bridge, making it likely to crumble apart. If a creature enters any such section on the bridge they must make a DC 15 DEX save or fall into the water below and lose any remaining movement. The entire weakened section collapses all at once. Those that succeed on the save may safely move to an adjacent section of the bridge for no additional movement cost.

   Green X – Caltrops: These pronged blades are conceale by dust, dirt, and jagged stones [WIS DC 10 to spot with Disadvantage] but otherwise use the normal rules for caltrops (Equipment, pg. 9) 

   Blue X – Falling Rocks: A tripwire strung between the cavern walls [WIS DC 15 to spot, DEX DC 13 saving throw negates]. If the wire is sprung it dislodges a bundle of boulders suspended above the passage that fall down onto anyone standing within 10 feet of the tripwire (squares adjacent to and in the areas marked with a blue X). 2d6 bludgeoning damage. All creatures beneath the rocks may make a DEX DC 13 save for half damage.

   Green Slime: The sections labelled with a green splotch indicate the presence of a growth of Green Slime (Bestiary pg. 52)

    Passages North, East, and South of the Bunker: These areas are off the map but will come into play in some capacity. Each is a wide passage that extends 40 feet off the map before turning sharply and leading into more narrow passageways. From the bunker, a creature can see anyone within 40 feet of the map’s edge, giving the players roughly one round to attack or prepare for foes once their enemies have rounded the corner and are approaching the areas pictured on the map. Essentially, players can make one ranged attack at any foe approaching or fleeing from sight of the bunker before the target is out of sight and likely safe.

With A Little Help From My Friends

The PCs are chosen to make this assualt in part because the dwarf troops are stretched thin, and because they have distinguished themselves in battle. There’s a good chance they just might pull this off with their limited numbers. That said, command isn’t leaving them high and dry, and is opting to assign a dwarf conscript to escort each PC as backup. The presence of the conscript has been factored in to the overall challenge of this encounter, and you need not divide or detract any experience from the PCs beacuse of their presence.

                             http://creativecommons.org/licenses/by-nc-nd/3.0/  

Image by Ruben Ramos http://rubengramos.deviantart.com/art/Dwarf-Fighter-305874602 used under Creative Commons: http://creativecommons.org/licenses/by-nc-nd/3.0/

Stats for the conscripts appear in the Against the Cult of Chaos [pg. 9] conversion document: *Make the following changes: •Attack bonus to +3, •AC 15 (Worn Scale Mail and Shield)

Phase 1: Charge!

The players will be approaching the bunker from the western edge of the map. Due to the cavernous nature of the terrain, there is no way to maneuver around the bunker; its purpose is to serve as a choke point against those approaching from outside the dwarven redoubt. The monsters garrisoning the bunker are technically speaking on guard, but a few days without any action has made them lax in their duties.

Players may attempt a DEX roll to sneak around and get a better view of the bunker’s numbers, defenses, and potentially nearby traps. This roll is opposed by the WIS of the kobold guards on duty (you need only make one roll for all the guards). If the players are not spotted, or instead opt to charge into the cavern without first scouting, then they have Advantage on their Initiative roll.

The first phase of the battle is a straight up assault, crossing through the no-mans-land of traps to dislodge the creatures holding the bunker. If the defenders lose 2/3 of their numbers of the Hobgoblin is killed, they attempt to flee.

Phase 2: Digging in

Once the PCs have secured the bunker, they will have a period of three hours to take a short rest, and then begin setting up traps, defenses, and otherwise keeping watch. After this time, the reinforcements of the monstrous horde arrive and attempt to dislodge the PCs from their defensive position.

 A simple DEX DC 10 check allows a PC to remove and reuse a trap left by the kobolds (This is an automatic success for anyone with proficiency in Thieves Tools). Otherwise, the crates and barrels of supplies just north of the bunker are full of crossbow bolts, hammers, spears, saws, shovels, nails, wood, spare daggers, and other such implements that the PCs could use to create impromptu fortifications (There was expanded construction intended for this bunker/customs station before the attack had commenced).

A careful search of the outside supplies [INT DC 13] reveals a small, ornate locked chest [DEX DC 10 for anyone with a lockpick, those trained in Thieves Tools have Advantage] containing 4 Healing Potions (The chest itself is worth 10 gp)

The players might be wise enough to keep a guard on while tending to their plans. If so, whoever is on watch will see the occasional kobold or goblin scout peeking around a corner to spy on their progress. They will flee quickly when they spy a sentry. If no guards are posted and the PCs are busy and vulnerable, 1d6+2 goblins will attack once before the three hours elapses.

Phase 3: Counter-Attack

At the end of three hours, a loud orcish warhorn booms through the chamber. The horde’s reinforcements have arrived! The PCs have two rounds to take positions. After that, the attackers arrive in waves (See “Monsters” below for what creatures comprise each formation:

Round 1: North and East formations

Round 3: South formation

Round 5: Rear Guard – Individuals arrive from [1d6: 1-2 North, 3-4 East, 5-6 South]

Phase 4: The Final Push

The horde has held its best for last, releasing all of its reserves and the unit’s fierce leader in a last-ditch, suicidal attempt to take the PCs down. These forces arrive 10 minutes after Phase 2, and come from the Eastern edge of the map.

Monsters

     •Bunker Defenders (200 EXP):

x6 Kobolds (Bestiary pg. 59)

x2 Kobold Dragonshields (Bestiary pg. 60)

x6 Goblins (Bestiary pg. 49)

x1 Hobgoblin -Stays inside bunker at all costs (Bestiary pg. 55)

     •Phase 2 – North Formation (140 EXP)

x2 Orcs (Bestiary pg. 70) 

     •Phase 2 – East Formation

x3 Kobold Dragonshields (100 EXP)

x4 Kobolds 

     •Phase 2 South Formation (80 EXP)

x8 Goblins

     •Phase 2 – Rear Guard (80 EXP)

x4 Goblins

x4 Kobolds

     •Phase 4 – Approaching from East

x1 Ogre (Bestiary pg. 69)

x1 Orc Warlord (Bestiary pg. 70)

x3 Orcs

Rewards

In addition to the combat experience granted for each phase of the fight, the PCs will find the dwarves quite pleased and unusually generous in the wake of the victory. Likewise, they will no doubt join the surviving dwarf soldiers and officials in a feast. 

•x5 Ornamental gems per PC

•A +1 Weapon with the Delver and Sentinel (Orc) properties. [Magic Items pg. 6]

 
2 Comments

Posted by on August 25, 2013 in Combat Encounter, Not Playtested


Tags: , , , , , , ,

The Abyss Gazes Back

20130725-233431.jpg


This adventure is intended for five players of 5th level (using D&D 4th Edition) or 4th level (using D&D Next playtest rules June 2013 Release)

The trick with finding a large lode of a rare and valuable mineral (especially one as coveted as Mithril) is keeping it a secret while you mine it. This week’s encounter brings the heroes into a “lost” mithril mine in search of treasures and historical trinkets. The only (surface) entrance into the mine is through an encoded teleportation circle – a security measure that kept it safe for a very long time.

But while dwellers above never managed to find the mineral trove, those that lurk below have known about it for quite some time…

Setup
The PCs have come across the “code” for activating a linked portal found in a now defunct section of a dwarven mine. Perhaps this information was given as a reward, found in the library of an evil lich, or plucked from the skeletal hand of those lost in a failed expedition. Either way, the dwarves of this community lost access to their most valued treasure: a nearly untapped lode of raw mithril. Whether or not the players share this with the dwarves is up to them (perhaps they are being employed but the leaders of this clanhold or thaig to explore the mine and deem it “safe.”

Whatever the case, the only way in is by incanting the magic words and drawing the required symbols to activate the portal. Everything seems to go fine…but unbeknownst to the party, there were a few errors in the scribing of the instructions.

A Neverwinter Night
This adventure was originally written with the Neverwinter Campaign Setting in mind. As such, the 4th Edition rules incorporate monsters from that source, though subbing them out for any aggressive subterranean Lurker/Artillery combo will suffice.

If you are using this encounter in a Neverwinter/Forgotten Realms game, it likely takes place under the cavernous halls of lost Gauntlgrym, or in chambers adjacent to The Chasm. In this case, you will likely wish to add one of the Plaguechanged themes from page 95 of the campaign setting book to the nothics. Likely, these lower mines have themselves been warped by the Spellplague, and strange properties may effect the mithril found here.

Plot Text
Something is definitely wrong. The harmonic thrum of the teleportation circle is now growling dissonantly. Everything was done perfectly – the words were spoken, the hand motions made, the sigils drawn properly into the runes… there is the expected flash of light as the portal activates, and then you feel nothing below you.

You crash to the ground, having dropped a mere two feet, but losing your footing and orientation. Wherever you are, it’s dark…very dark. The air around you is cold and unmoving, dampness presses against your skin and off in the distance is a faint silver glow. The emanating light is coming from the rocky floor beneath you. As your eyes adjust, you can see its source, a vein of pure mithril.

What you don’t see are your friends. Did they teleport along with you? Were they left behind? Did something…worse happen?

Before you can investigate, a reptilian shriek shatters the grave quiet of the cavern. There’s something out there.

Map

20130727-191722.jpg
A high-res poster of this map is included in theVaults of the Underdarkmap pack.

Features of the Area

    •Illumination:The faint glow from the pure mithril gives off dim light in any 10 feet (2 squares) from a mithril vein (visible on the map as silvery swaths on the ground). Otherwise there is no natural light in the mine. A pair of everburning candles sits on the desk in the foreman’s office.

    •Rubble: These sections discarded equipment, wrecked and abandoned barrels, overturned carts and debris count as rough terrain. A close inspection with Perception/Intelligence (Search) Moderate DC, reveals 1d100 gp worth of raw mithril among the wreckage of each debris pile (seven piles total).

    •Foreman’s Office: Still warm and inviting thanks to the everburning candles on the desk, this small room comprised the office of the mine’s work director. His ledger and logbook contains mostly the boring minutiae of running a mine: weights, measures, shift schedules, etc. if a PC is insistent on poking through the books, they will find that a large load of mithril was exported to a hidden location not far away for “safe keeping.” The logbook includes either a treasure map or a riddle that points to the cache’s location. Obtaining this trove of unprocessed mithril would give the party an additional treasure of no small value.
    Also in the office is a locked (Moderate DC) treasure chest containing a few changes of clothes (now moldered with age), and a magical armor of the appropriate level.
    At your discretion and for an increased challenge, the chest might also be trapped, with a dead nothic nearby as a hint to what kind of security measures the chest employs.

    •Teleportation Circle: This is where the PCs were supposed to arrive when entering the hidden mine. They can escape using the same encoded magical incantations, though they will suffer the same discombobulated arrival on their return trip (which will likely be more meddlesome than disastrous. An Arcana/Intelligence (only if trained in Magical Lore) Moderate DC check will fix the malfunction, allowing for normal use of the portal.

    •Exits: The southern corners press on to 10 foot wide corridors leading off into different directions and other passages in the cavern system. Where they lead is up to you.

Monsters

D&D 4th:
x4 Nothic Mindwarp (Neverwinter Campaign Setting pg. 95)
x2 Nothic Plaguegazer (Neverwinter Campaign Setting pg. 94)

D&D Next:
x7 Nothics

20130718-092731.jpg

Tactics
The nothic make use of the shadowy environment and their predilection towards stealth to make quick strikes against the PCs, blasting them with their gaze attacks or swiping with their claws, then ducking away to hide around a corner. They will try to keep the PCs separated and uncoordinated, keeping two nothics on particularly weak targets, alternating which attacks and which hides. They will take their time to double back or circle around through the maze in order to strike unexpectedly.

Rewards
Consider granting additional experience equivalent to a level 1 monster to account for the initial advantage the nothic’s have in attack their dispersed foes.

Most of the mithril in this mine is inaccessible (since it has yet to actually be mined) but clumps of ore can be found in the wrecked carts and barrels. Selling or trading these might grant the party the equivalent of a monetary treasure parcel (or us the guidelines for random value described in the “Rubble” entry above.)


Tags: , , , , , , , , , ,

Fungal Lake Dead-Drop

This encounter is intended for use with either 4th Edition Dungeons and Dragons or the July iteration of the D&D Next Playtest. 4th Edition: Five players of 6th level / D&D Next: Five players of 5th level

Every environment needs water for living creatures to survive – and even the warped beasts of the Underdark are no exception. The presence of a small but significant freshwater pond not far from a surface entrance into the depths of this subterranean nightmare world causes alarm to most. For adventurers, it means opportunity.

This encounter was originally written for my now defunct Neverwinter game, and as such, references an organization related to that campaign setting. None of that flavor is necessary to run the encounter, however. The situation has the players meeting shady, possibly hostile criminal elements for a trade or deal – in a location that is even more dangerous and alien. Unbeknownst to either party, they are stepping into the home of a colony of Myconids – one of the Underdark’s bizarre inhabitants. The fungal monsters attack both sides as interlopers; but whether or not this ruins the deal is up tot he players.

Setup
Agents of the Drow spy network, The Bregan D’aerthe, have approached the players through their surface contacts in Neverwinter regarding a bit of business. Perhaps the Drow have information the players desperately need and are willing to pay for, maybe they have acquired (or seem to have acquired) knowledge or an item the mercenary Drow are after. Whatever the case, a meet is scheduled near a large pond in a cavern not too far from the surface (A site used by Bregan D’aerthe agents to pass secret messages and materials). Strictly speaking, this will require the players to go into the uppermost reaches of the Underdark – a dangerous proposition. They will need to decide whether or not the benefit outweighs the risk (And in order to prod them into the deal, there should be a clear and significant reward).

Map

20130709-175659.jpg
A high-res poster of this map is included in theVaults of the Underdarkmap pack.

At the Start of Combat: Position the Myconids throughout the cavern near regular giant mushrooms. They have been lying in wait the whole time, camouflaged among the unanimated fungi.

The PCs and Drow begin (most likely) at the opposite shores of the pond.

Plot Text
The erie glow from the mushrooms and the shimmering of fluorescent algae off the water hasn’t stopped being unnerving to you even after waiting half an hour. In the Drow’s defense, if this were an ambush or a trick, they would have sprung it by now…unless of course the plan was to make you die of boredom. Finally you ear a singsong voice call out “Sorry we took so long, dangerous voyage, this one.”

A petite, female Drow woman rounds a corner in the caverns on the opposite side of the pond. You note how unnerving it was that you never heard her footsteps echoing in this enormous cavern. Slinking out of the shadows behind her are two male Drow, each clad in dark armor with sword at his side. “I know what you’re thinking but calm down, surface-dwellers. We’re here to deal. Think about it, if we wanted you dead would we bother with theatrics?” The Drow and her party approach the banks of the pond on their side and beckon for you to do similarly.

Negotiation
The specifics of the meet will depend on your campaign. Regardless, the players actions during the negotiation will determine how the drow act during the pending combat. If the players come off rude and uncooperative, or worse, if they are too cooperative int eh proceedings (not down bidding the drow, showing any sort of weakness, seeming indecisive or amateur) then the Bregan D’aerthe agents will use the battle as an excuse to slay the players and take what they were offering in trade.

However, if the players impress the drow, they will serve as an ally in the ensuing battle, hoping that the unexpected skirmish doesn’t sour their deal. Should the players successfully intimidate or wound the Drow before combat begins in earnest, they will cut their losses, and seek to flee if possible.

Regular roleplaying and your judgement of the drow’s response should be enough to adjudicate this encounter. However, if the players are eager to use their skills and social abilities, consider running this scene as a Complexity 1 or 2 Skill Challenge. Success means the drow serve as allies, failure will ensure that they turn on the PCs if able.

Primary Skills: Diplomacy, Bluff, Intimidate, Insight
Secondary Skills: Dungeoneering, Perception (If items are involved), Appropriate Knowledge skill (If secret information is being passed along)

Tactics
Drow
The Bregan D’aerthe mercenaries will vary their tactics depending on their relationship With the players.
• Indifferent: A “better part of valor” approach, keeping away from the myconids and allowing the PCs to take the brunt of the beating when possible, though likely not attacking them. In this case, if an opportunity to steal what (or whom!) the PCs are bringing to the offering table presents itself, the Drow will take it, even if this means killing a single PC.

•Cooperative: If negotiations went well, the Drow will regard the PCs as comrades in arms, knowing that the conflict can be resolved quickly with teamwork. They will set up flanking maneuvers, attack targets the PCs debilitate, and offer covering fire. Combat might be another opportunity for the PCs to prove their trustworthiness, healing or aiding their “allies” in this skirmish.
All that said, the Drow are selfish by nature and as a result of their occupation. Don’t go overboard in their assistance.

•Hostile: If things went south, then the Drow might see the myconid attack as a perfect opportunity to get what they want without breaking a sweat. They will take pot shots at the PCs first, hoping the monsters will wear them down enough to be easy targets and recover whatever valuables they have, or making the pending interrogation that much easier.
4e
The Myconid Guards move in immediately, using their Pacification Spores on the most physically imposing combatants (at least one of them will approach the Drow). The Sovereign and Rotpriest will move together, joined at the hip so that the leader can retain the benefits of the Rotpriest’s healing.

Next
The Myconids all focus on a single target (one of the Drow, if you are feeling forgiving towards your players) attacking it together as a colony. The goal is to make bodies as soon as possible for the Sovereign to re-animate. Meanwhile, the Adults choose to hamper any combatant that deals a great deal of damage, stunning them if possible.

Resolution
The battle is another opportunity to weigh the PCs competence. If they performed admirably, this might tip the scales in the PCs favor, proving to their perfidious business partners that they are not to be trifled with. Otherwise it might give the Drow an opportunity to strike or flee while the party is weakened or off balance.

Monsters
4th: x1 Myconid Sovereign (Monster Manual II, pg. 164)
x1 Myconid Rotpriest (Monster Mnaual II, pg. 164)
x3 Myconid Rotslammer (Underdark) -Or- Myconid Guards (Monster Manual II, pg. 164)

x2 Drow Swashbuckler (Neverwinter, pg. 122)
x1 Drow Informant (Neverwinter, pg. 122)

D&D Next: x1 Myconid Sovereign (Against the Slave Lords Bestiary pg.58)
x2 Myconid Adult (Against the Slave Lords Bestiary pg.57)
x6 Myconid Juveniles (Against the Slave Lords Bestiary pg.57)

x3 Drow pg. 40 (The Informant replaces a short sword for Dagger, and adds “Invisibility” to her spellcasting list)


Tags: , , , , , , , , , , ,