This adventure is intended for five players of 3rd level using the August 2013 D&D Next/5th ed Playtest
As you’ve likely heard, the public component of the playtest for D&D Next/5th ed is coming to a close. While I was a bit surprised that public playtesting would not be a constant, I’m not un-happy with the decision. My gaming group has been consistently playing with the playtest rules for almost a year now, and having a “set” core of rules will be a welcome change for those frustrated with having to re-imagine their PC every couple of months (an expected symptom of playtesting but nonetheless tiresome when you were just getting used to your character).
While I take umbrage with some elements of the newest release (namely the overinflated feats, and the lack of character customization at Level 1) I’ve generally been extremely happy with the playtest, seeing it as a marriage of 3rd and 4th editions along with some new DNA that makes for a much more manageable game. It’s fun for the players, and it is effortless to DM. And I can’t sing the praises of the emphasis on Bounded Accuracy enough!
Given all this, you’ll finally see the inevitable shift towards exclusively D&D 5th content here on Save Vs Weekend. While writing up hybrid adventures isn’t terribly arduous (as WoTC is demonstrating with the ambitiously multi-edition Murder in Baldur’s Gate) I usually have limited time to write, given all my various obligations. Saving a little time by writing for one edition (the easier one to write for as well!) means I can get more encounters out to you faster.
Look on the bright side – if you play Pathfinder, it will require little conversion on your part to use my content now! And if you are a die-hard 4e fan, now you have another traitor to rage against! Edition turn-coats!
Bunker Battle
This week’s encounter serves as a perfect follow up piece to “Battlefield Extraction.” It employs the accompanying “Dwarven Redoubt” map – both of which come with Vaults of the Underdark and are designed to be used in conjunction at the same time. For our purposes it is a separate location, though you may wish to presume the assigned mission is all a part of the same military campaign featured in the plot to the previous encounter.
As a side note for Dragon Age fans, these maps strongly reminded me of that world’s “Deep Roads” and it is no accident that the concept is reflected a bit in these encounters. The best thieves steal from the best.
Setup
The PCs have agreed to aid (or been coerced into service by) an army of dwarves, hard pressed to defend their underground community. Thanks to the PC’s efforts the tide is beginning to turn, but one major impediment stands in the way of immediate military progress: A fortified bunker teeming with enemy forces. Their presence in the fortification means the combined might of goblins, kobolds, orcs, ogres, and worse are constantly threatening a devastating counter attack. Due to it’s strategic position, the only option is a more-or-less frontal assault. The PC’s will need to navigate through a series of makeshift traps to dislodge their opponents. After a brief respite, the party will have to dig in and face a brutal counter-offensive; surviving until their own reinforcements arrive.
But don’t think the dwarves are simply exploiting the PC’s kindness – each player will gain control of a dwarf soldier to serve as his or her second on the battlefield. Give each partner a distinct personality and make them likable – that way it’s all the more heart-wrenching when they die horribly in battle!
Map

A poster version of this map is available in the “Vaults of the Underdark” map pack from WoTC
Features of the Area
Illumination: Braziers, torch sconces, and a battlefield fires mean this chamber is filled with bright illumination.
Stones, Rubble, Crates and barrels: Rough terrain.
Heavy Wooden Doors: These sturdy doors are barred from the inside (AC 13, HP 35).
Arrow Slits: Three-Quarters Cover for those inside the bunker, but they do not hamper the ability to make ranged attacks for those firing out of them. Only reach weapons like a glaive can make melee attacks through an arrow slit, and do so with disadvantage.
Yellow X – Bear Traps: These round metal traps with jagged teeth feature a pressure plate in the middle. When a creature steps on the plate, it clamps the steel jaws shut on the victim’s leg. [WIS DC 10 to spot with Disadvantage, though a DEX DC 15 saving throw negates the trap’s effects. On a failed save, the bear trap deals 1d4 piercing damage and the target is immobilized. A trapped creature can escape with a DC 10 STR check, but takes an additional 1d4 slashing damage. Alternately, a character trained in Thieves Tools can disable the tap with a DC 10 DEX check as an action].
Red X – Collapsing Bridge: Kobold trapsmiths have weakened the supports on the bridge, making it likely to crumble apart. If a creature enters any such section on the bridge they must make a DC 15 DEX save or fall into the water below and lose any remaining movement. The entire weakened section collapses all at once. Those that succeed on the save may safely move to an adjacent section of the bridge for no additional movement cost.
Green X – Caltrops: These pronged blades are conceale by dust, dirt, and jagged stones [WIS DC 10 to spot with Disadvantage] but otherwise use the normal rules for caltrops (Equipment, pg. 9)
Blue X – Falling Rocks: A tripwire strung between the cavern walls [WIS DC 15 to spot, DEX DC 13 saving throw negates]. If the wire is sprung it dislodges a bundle of boulders suspended above the passage that fall down onto anyone standing within 10 feet of the tripwire (squares adjacent to and in the areas marked with a blue X). 2d6 bludgeoning damage. All creatures beneath the rocks may make a DEX DC 13 save for half damage.
Green Slime: The sections labelled with a green splotch indicate the presence of a growth of Green Slime (Bestiary pg. 52)
Passages North, East, and South of the Bunker: These areas are off the map but will come into play in some capacity. Each is a wide passage that extends 40 feet off the map before turning sharply and leading into more narrow passageways. From the bunker, a creature can see anyone within 40 feet of the map’s edge, giving the players roughly one round to attack or prepare for foes once their enemies have rounded the corner and are approaching the areas pictured on the map. Essentially, players can make one ranged attack at any foe approaching or fleeing from sight of the bunker before the target is out of sight and likely safe.
With A Little Help From My Friends
The PCs are chosen to make this assualt in part because the dwarf troops are stretched thin, and because they have distinguished themselves in battle. There’s a good chance they just might pull this off with their limited numbers. That said, command isn’t leaving them high and dry, and is opting to assign a dwarf conscript to escort each PC as backup. The presence of the conscript has been factored in to the overall challenge of this encounter, and you need not divide or detract any experience from the PCs beacuse of their presence.
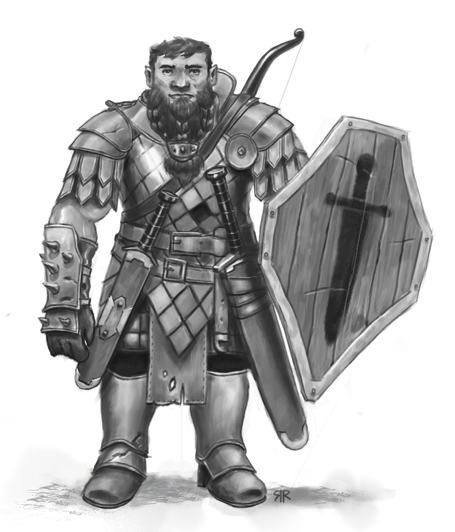
Image by Ruben Ramos http://rubengramos.deviantart.com/art/Dwarf-Fighter-305874602 used under Creative Commons: http://creativecommons.org/licenses/by-nc-nd/3.0/
Stats for the conscripts appear in the Against the Cult of Chaos [pg. 9] conversion document: *Make the following changes: •Attack bonus to +3, •AC 15 (Worn Scale Mail and Shield)
Phase 1: Charge!
The players will be approaching the bunker from the western edge of the map. Due to the cavernous nature of the terrain, there is no way to maneuver around the bunker; its purpose is to serve as a choke point against those approaching from outside the dwarven redoubt. The monsters garrisoning the bunker are technically speaking on guard, but a few days without any action has made them lax in their duties.
Players may attempt a DEX roll to sneak around and get a better view of the bunker’s numbers, defenses, and potentially nearby traps. This roll is opposed by the WIS of the kobold guards on duty (you need only make one roll for all the guards). If the players are not spotted, or instead opt to charge into the cavern without first scouting, then they have Advantage on their Initiative roll.
The first phase of the battle is a straight up assault, crossing through the no-mans-land of traps to dislodge the creatures holding the bunker. If the defenders lose 2/3 of their numbers of the Hobgoblin is killed, they attempt to flee.
Phase 2: Digging in
Once the PCs have secured the bunker, they will have a period of three hours to take a short rest, and then begin setting up traps, defenses, and otherwise keeping watch. After this time, the reinforcements of the monstrous horde arrive and attempt to dislodge the PCs from their defensive position.
A simple DEX DC 10 check allows a PC to remove and reuse a trap left by the kobolds (This is an automatic success for anyone with proficiency in Thieves Tools). Otherwise, the crates and barrels of supplies just north of the bunker are full of crossbow bolts, hammers, spears, saws, shovels, nails, wood, spare daggers, and other such implements that the PCs could use to create impromptu fortifications (There was expanded construction intended for this bunker/customs station before the attack had commenced).
A careful search of the outside supplies [INT DC 13] reveals a small, ornate locked chest [DEX DC 10 for anyone with a lockpick, those trained in Thieves Tools have Advantage] containing 4 Healing Potions (The chest itself is worth 10 gp)
The players might be wise enough to keep a guard on while tending to their plans. If so, whoever is on watch will see the occasional kobold or goblin scout peeking around a corner to spy on their progress. They will flee quickly when they spy a sentry. If no guards are posted and the PCs are busy and vulnerable, 1d6+2 goblins will attack once before the three hours elapses.
Phase 3: Counter-Attack
At the end of three hours, a loud orcish warhorn booms through the chamber. The horde’s reinforcements have arrived! The PCs have two rounds to take positions. After that, the attackers arrive in waves (See “Monsters” below for what creatures comprise each formation:
Round 1: North and East formations
Round 3: South formation
Round 5: Rear Guard – Individuals arrive from [1d6: 1-2 North, 3-4 East, 5-6 South]
Phase 4: The Final Push
The horde has held its best for last, releasing all of its reserves and the unit’s fierce leader in a last-ditch, suicidal attempt to take the PCs down. These forces arrive 10 minutes after Phase 2, and come from the Eastern edge of the map.
Monsters
•Bunker Defenders (200 EXP):
x6 Kobolds (Bestiary pg. 59)
x2 Kobold Dragonshields (Bestiary pg. 60)
x6 Goblins (Bestiary pg. 49)
x1 Hobgoblin -Stays inside bunker at all costs (Bestiary pg. 55)
•Phase 2 – North Formation (140 EXP)
x2 Orcs (Bestiary pg. 70)
•Phase 2 – East Formation
x3 Kobold Dragonshields (100 EXP)
x4 Kobolds
•Phase 2 South Formation (80 EXP)
x8 Goblins
•Phase 2 – Rear Guard (80 EXP)
x4 Goblins
x4 Kobolds
•Phase 4 – Approaching from East
x1 Ogre (Bestiary pg. 69)
x1 Orc Warlord (Bestiary pg. 70)
x3 Orcs
Rewards
In addition to the combat experience granted for each phase of the fight, the PCs will find the dwarves quite pleased and unusually generous in the wake of the victory. Likewise, they will no doubt join the surviving dwarf soldiers and officials in a feast.
•x5 Ornamental gems per PC
•A +1 Weapon with the Delver and Sentinel (Orc) properties. [Magic Items pg. 6]
